> For the complete documentation index, see [llms.txt](https://docs.revrobotics.com/llms.txt). Markdown versions of documentation pages are available by appending `.md` to page URLs; this page is available as [Markdown](https://docs.revrobotics.com/brushless/neo/v1.1/pinion-pressing.md).
# Pinion Pressing Guides
## NEO V1.1 Pinion Pressing Guide
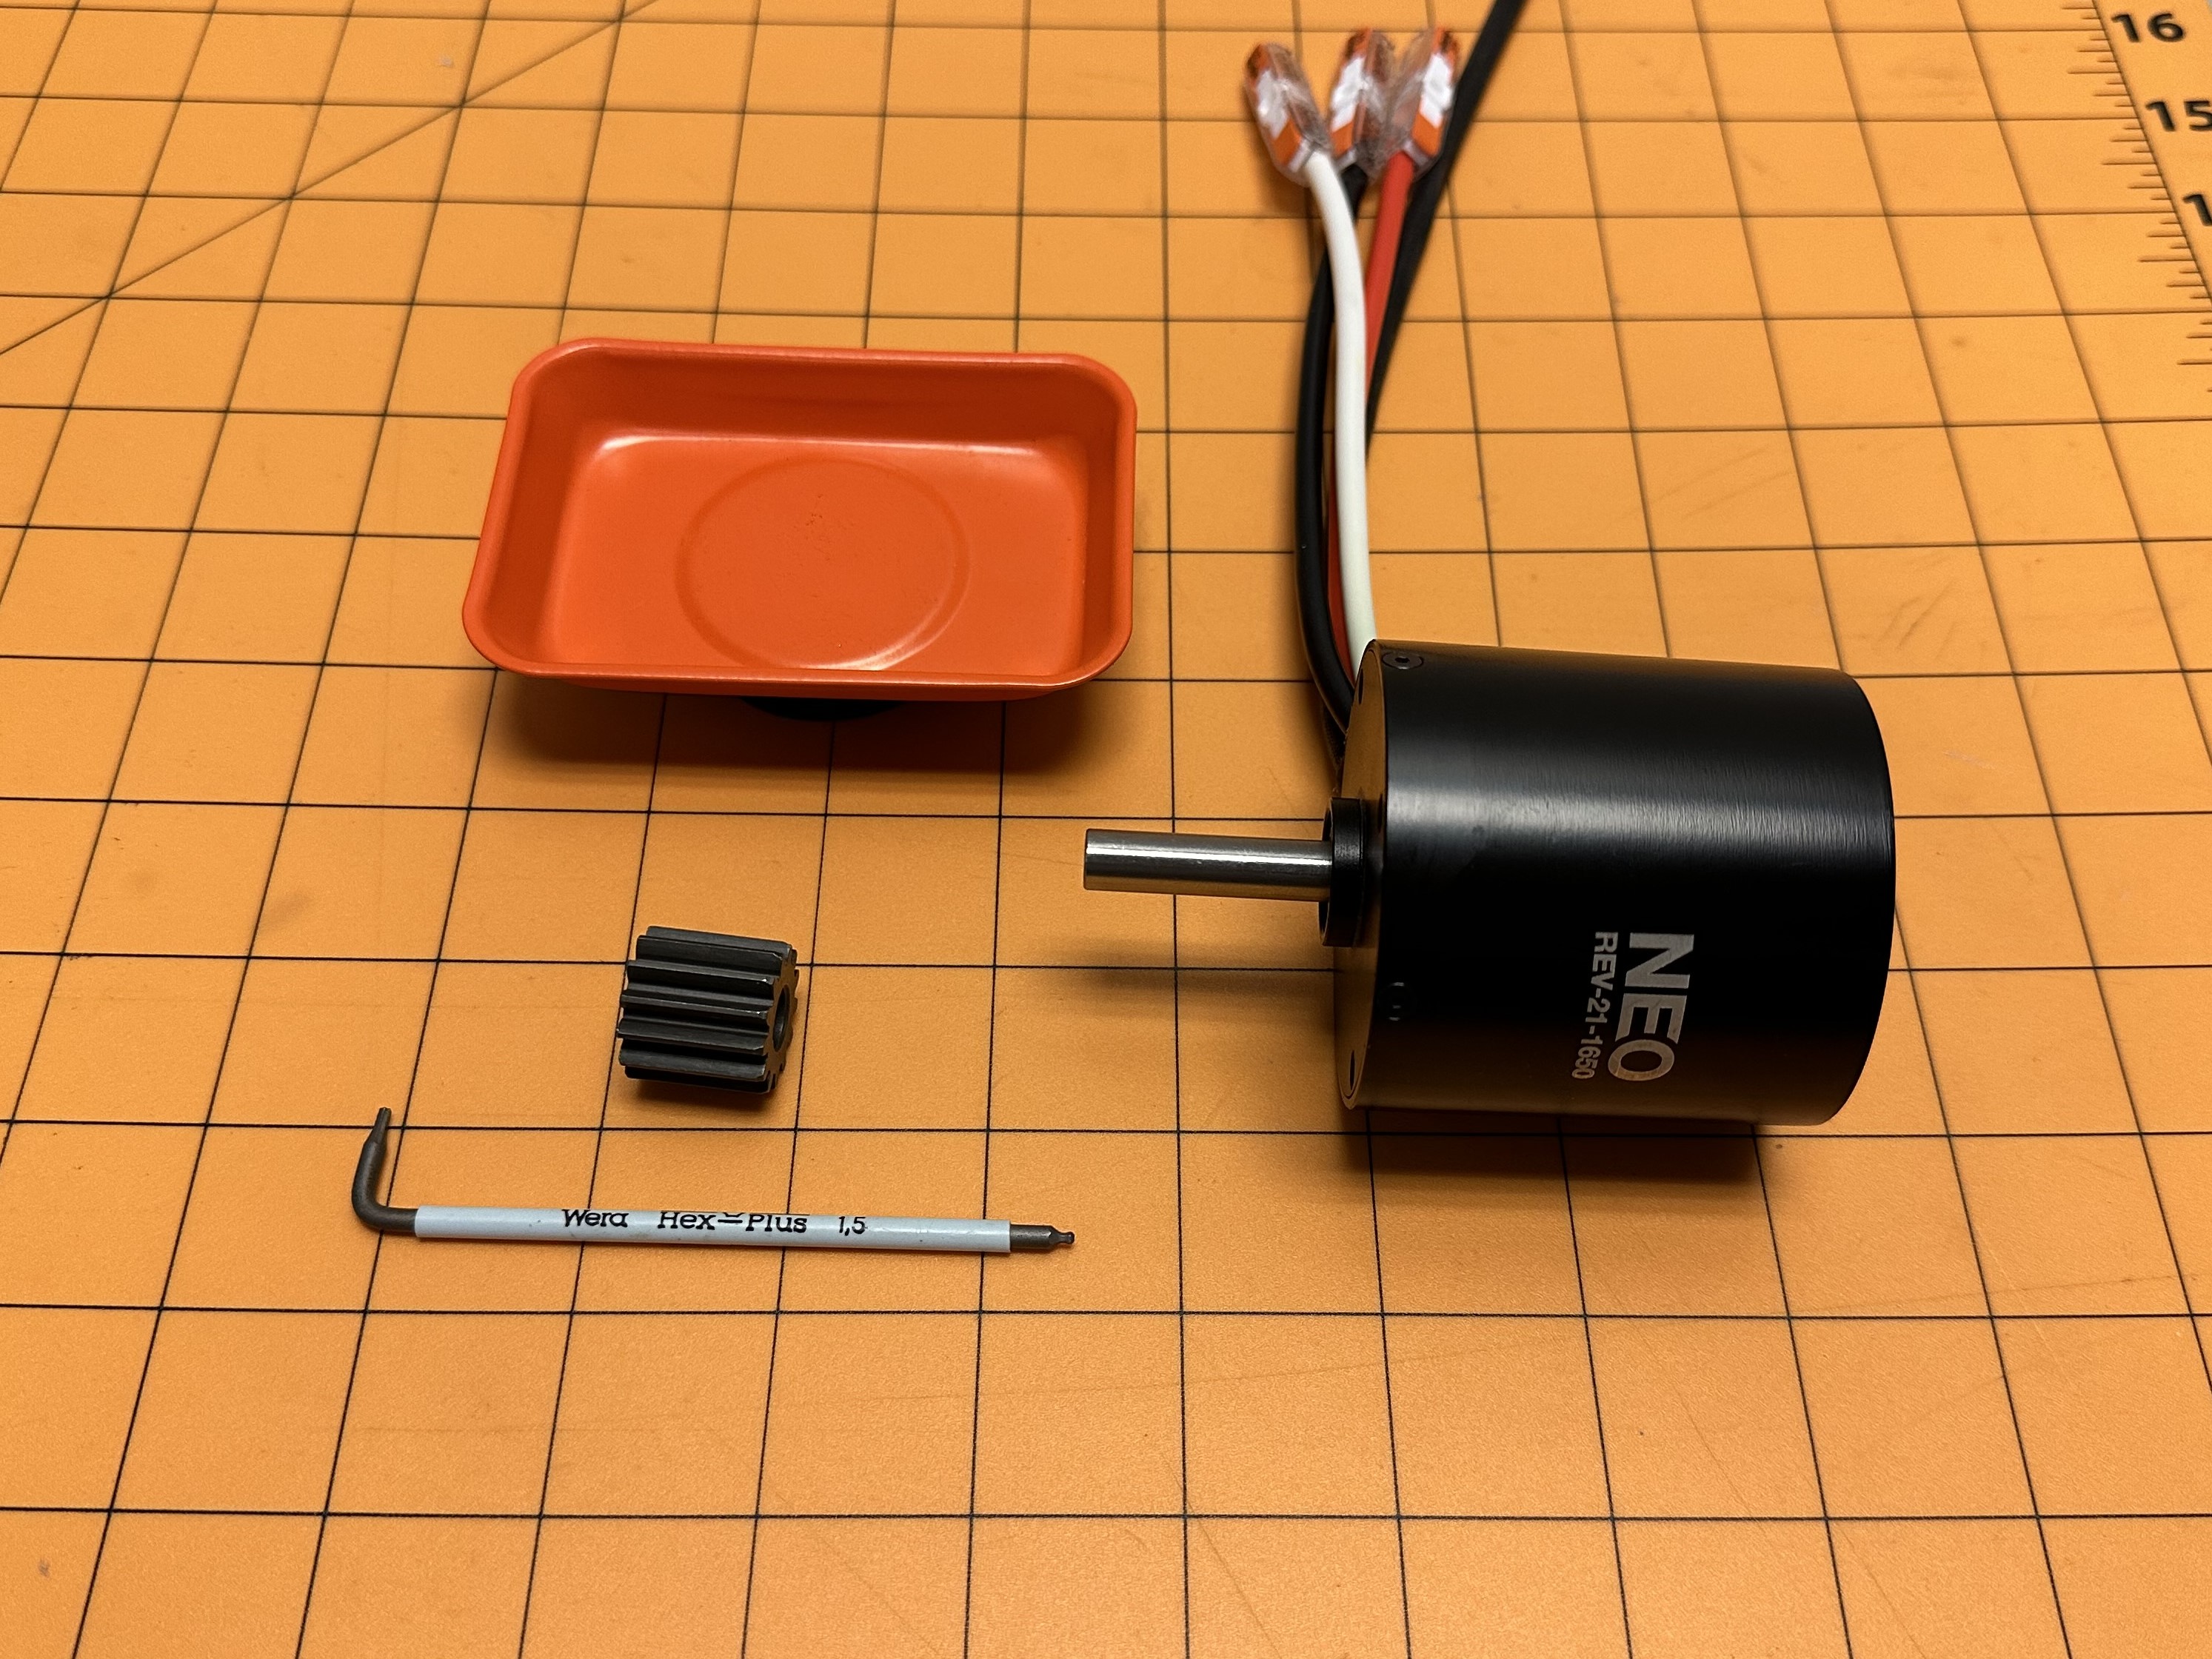
### Needed Materials
* NEO V1.1 (REV-21-1650)
* 1 - 10-32 x 3/8in long Socket Head Screw
* Press Fit Pinion
* Arbor Press
### Steps
|
1) Take a 10-32 x 3/8in long socket head screw and screw it into the back of the motor finger tight.
DO NOT USE AN ALLEN WRENCH OR POWER TOOL The screw is intended to support the end of the NEO's shaft while pressing on the pinion. Tightening the support screw with an Allen wrench or power tool may damage the motor and/or shaft.
|  |
| ---------------------------------------------------------------------------------------------------------------------------------------------------------------------------------------------------------------------------------------------------------------------------------------------------------------------------------------------------------------------------------------- | -------------------------------- |
| 2) Using a flat arbor press plate, balance the motor with that screw down on the arbor press |  |
| 3) Proceed with pressing the pinion as usual. When complete, ensure that you remove the 10-32 socket head screw from the back of the NEO. |  |
{% hint style="warning" %}
Do not attempt to run the NEO while a screw is still attached to the back of the motor. Not removing the screw will damage the motor and/or shaft.
{% endhint %}
## NEO V1.0 Pinion Pressing Guide
### Needed Materials
* NEO V1.0 (REV-21-1650)
* A high-quality 1.5mm Allen Key (i.e. WERA Tools, Bondhus)
* Loctite 242
* Arbor Press
### Steps
| 1) Locate the first of three screws holding the back can to the front plate of the motor. |  |
| ------------------------------------------------------------------------------------------------------------------------------------------------------------------------------------------------------------- | ------------------------------------------------------------------------------------------------------------------------------------------------------------------------------------------------------------- |
| 2) Using a high-quality 1.5mm Allen Key, remove the bolt and set aside. Repeat this for the other two bolts around the back can. **Make sure the Allen Key is fully seated in the bolt head during removal.** |  |
| 3) Remove the back can. Set it and the three bolts aside for reassembly after pressing on the pinion. |  |
| 4) Place the NEO upright in the arbor press. Make sure to hold the bottom of the motor flat against the press plate, supporting the bottom of the shaft. |  |
| 5) Press on pinion. After pinion is pressed on reattach the back can. We recommend using Loctite 242 to complete the reassembly. |  |